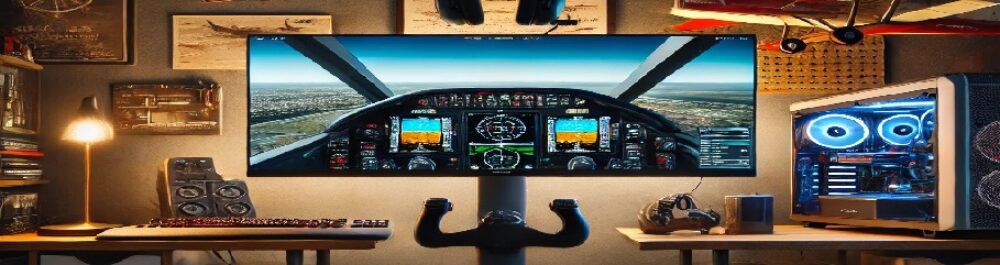
X Plane 11 Multiple Monitors Setup – Take your Flight Simulator experience to new heights with these multi-monitor screen configuration:
Your experience flying in X-plane is substantially improved by purchasing more monitors. Having a wider view angle improves the real-world experience.
Of course, you could use a wider angle on one monitor, but that wouldn’t be the same. Let’s examine the distinctions.
X-plane 11 using only one monitor:

One monitor can make for a fairly excellent arrangement, depending on your goals and financial constraints. My first television was a 46-inch 4K model, which looked incredible.
Set your field of view by going to SETTINGS, GRAPHICS, and MONITOR CONFIGURATION (FOV). The angle that appears on your monitor is based on the field of view. The default setting is 60 degrees, but increasing it gives your monitor more visual information about the planes around it.
The cockpit is rather well visible when set to 120. However, in my opinion, this setting lacks realism.
Three monitors for X-Plane 11:
I failed to see that side-view, which is impossible with a single monitor. However, I was unsure of how many monitors I should utilize for my X-plane simulator. I was seriously worried about:
⦁ How many monitors would I need to recreate gazing out a real cockpit window?
⦁ How could I choose the ideal viewing position?
⦁ Could all the monitors be driven by my hardware?
What would be the ideal configuration for my multi-monitor X-plane 11?

The first answer that came to mind for me was a four-monitor layout because I am creating a Boeing 737 cockpit. Because there are two big windows in the front and two minor windows on each side of the Boeing jet. With four monitors—two in the front and one on each side—using widescreen displays appeared to be a simple decision.
The first two of the four monitors that I bought were my first purchases. One thing, though, I had not anticipated. There is a bezel in the middle of the two front windows if you gaze in the cockpit.
The centre of the pilot’s vision, who is seated to the left in the cockpit, will be around the centre of the left window when facing forward. However, because X-plane treats the centre as the sum of the displays, the centre of the pilot’s vision (your view) will be where the bezel is in the aircraft.
Although there are numerous options, moving that central point is not ideal.
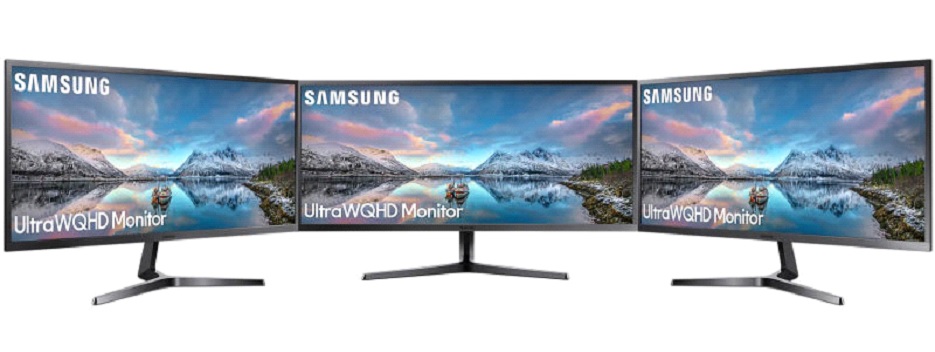
After a while, I grew frustrated with that layout and found myself frequently staring at the bezel, so I transformed it into a three-monitor setup and bought an additional monitor. As would be expected in a cockpit, I am using 21:9 UltraWide monitors, giving it a more narrow and wide vision.
Hardware Needed for X-plane Graphics:

X-plane consumes a lot of resources, especially when used with many monitors. You can utilize many computers, but for my cockpit arrangement, I wanted to do everything I could to keep with just one. As previously stated, the native resolution of three UW monitors, which is 10320 by 1440, must all be calculated by the same computer.
What constitutes a good framerate in a Flight Simulator is much debated. I would suggest 30 fps as a general guideline (frames per second). I expected the RTX3080 graphics adapter, which I am using, to be a pain. And it did, using a single monitor. The frames per second quickly decreased when using three monitors.
Monitor settings for X-Plane 11:
When employing multiple displays, each one will display a portion of the chosen cockpit view. Therefore, the first thing you should choose is the size of the angle that all of the displays will cover. The ideal configuration would be 180 degrees, allowing you to see clearly from straight left to straight right. That would necessitate five monitors in my setup, which was a bit of hardware investment I didn’t want to do. Therefore, I choose to use three monitors at a 135° angle, with the side monitors tilted at a 45° angle, as shown below. This provides me with an excellent hardware/viewing angle cost/benefit ratio.
The bezel around each screen leaves some additional space between the displays, which is problematic because, in an ideal world, the three monitors would be integrated into one giant screen, which is dark plastic. As a result, X-Plane sees an undesirable scenario where the leftmost pixel on the centre display is close to the rightmost pixel on the left monitor. However, the bezel, which is dark from the perspective of the spectator, appears to be there. Around 26mm wide in my setup. When moving things from one screen to the other in X-plane, this leads to distortions.
Luckily, the X-plane arrangement allows us to account for that. There are various approaches, and which one you like depends entirely on your visual preferences. To achieve the best visible result, though, here is how I did it:
Since the side monitor’s actual physical angle is 45 degrees, that angle was chosen for the lateral field of view. Additionally, the left screen’s lateral rotation offset was set to -46.40, and the right screen’s to 46.40. In order to make up for the bezel area. A PC is running across five displays. Three monitors, as previously mentioned, plus two more monitors for MIP displays in a payware airport. Just keep the frame rate at 30. This increases all the way to 50+ when the aircraft takes off.
That’s it! Hope you’ve enjoyed reading this article and have found it useful. Feel free to share your opinion in the comments below and let me know if you’re using a single monitor for X-Plan or if you prefer the multi-monitors. I would be happy to see your comments below and will reply to them for sure!
Thank you and see you soon in the next article.